Teaching about landforms? Fast & slow changes to Earth’s surface? Plate tectonics? Looking for the perfect STEM Challenge activity to apply all that learning?
The Basics
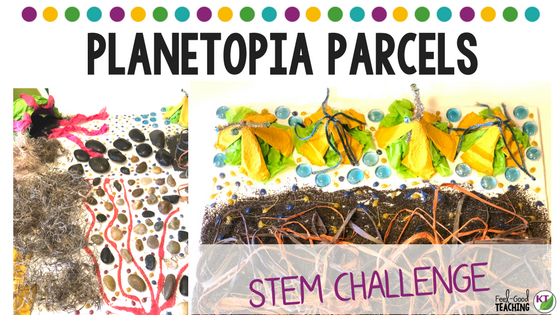
Students work individually or in partners/groups against a list of criteria and constraints to create the nonliving surface of the fictional planet, Planetopia.
Video Walk-through
The fastest way to explain is to show you! Check out the video below for details. The transcription is available at the end of this post if you’d like to read along.
Bonus Video: Set-up Tips
Materials

Note: The links below are Amazon Affiliate links. Find out more on the disclosure page.
-
- Foam board for parcel base
- ~ 12×12 in. per student
- Construction paper
- Pipe cleaners
- Cardboard scraps
- Tissue paper
- Foil
- Scissors
- Glue and/or tape
- Small rocks
- Raffia, moss, yarn
- Cotton
- Design analysis handouts (included in resource)
- Foam board for parcel base
- Optional
- Crayola Model Magic or clay
- Sequins, beans, pasta, beads
- Paint
- Craft sticks
- Pom poms
- Felt or fabric scraps
- Sand Paper
- Small cups and/or bowls
- Hot glue gun
- Rubber bands
- Paperclips
- Toothpicks
- Coffee stirrers
- Colored sand
Other Planetopia Project STEM Challenges
Save Time! Get the Resource!


Pin Me!
Transcription
Hi, I’m Kerry for Feel Good Teaching and today is the very best day of the week, STEM Challenge Day. Today we’re talking about a new challenge in the Planetopia series. This is Planetopia parcels and as you probably already guessed this ones all about landforms and fast and slow changes to Earth’s surface. I’ll tell you all about it right after we check out the materials and the STEM Challenge cycle.
This is the Stem Challenge Cycle you should follow for every challenge. I’ve defined each step in another video. You’ll find a link to that video in the description below.
CHALLENGE BASICS
Now if this is the first challenge you’re hearing about in the Planetopia series the premise is that it’s 20 years or more into the future and the students are being sent on an exploratory mission to the fictional planet, Planetopia. Now it’s Earth-like but the students need to figure out if it’s really going to be habitable or not. In this challenge students are going to be designing the non-living components of Planetopia’s surface. So, anything that’s a landform and anything that’s a body of liquid, or even gasses but no living things, no plants, no creatures, no aliens. And the reason we’re limiting this challenge to just the geosphere and the hydrosphere is that we want to save the biosphere for its own challenges.
Our focus here is going to be on geology standards, fast and slow changes to Earth’s surface, weathering, erosion, plate tectonics, even states of matter and changes in state. And we’re going to hold back those life science standards for Planetopia plants and creature. In this challenge I do have students work in groups, however, they each get to have their very own parcel of land. This gives you a little bit of flexibility in case at any point you want students to change groups or you want them to follow-up on an extension activity using their very own parcel.
Typically for this challenge, I’ll get one large piece of foam board per group and use an X-Acto knife to cut it into fourths. Of course, you can give students smaller parcels of land but I wouldn’t go any smaller than 12 x 12 inches.
CRITERIA & CONSTRAINTS LIST
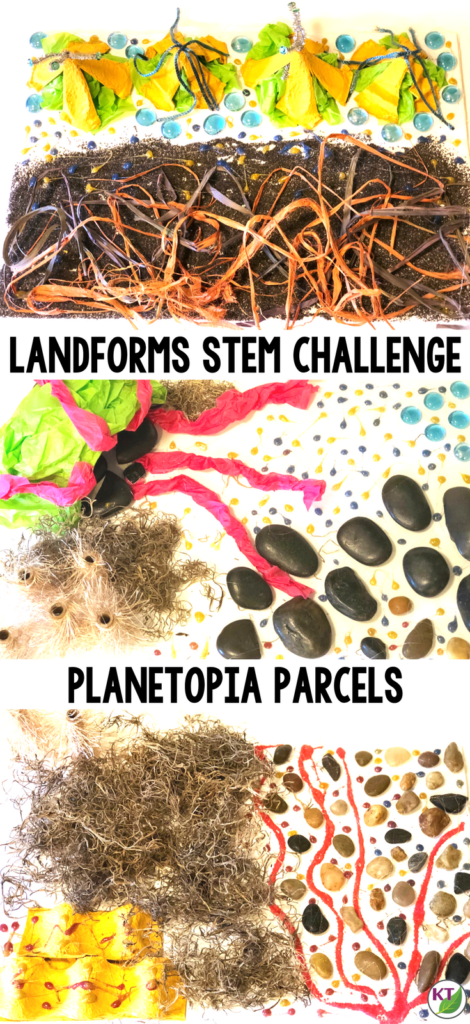
The criteria and constraints start very simply on this challenge. The group’s most show at least three different types of landforms that vary in shapes, textures, and elevations. That’s going to be key if you want to follow-up with weathering, erosion, and plate tectonics lessons. They also need to show at least two bodies of liquid, it does not have to be water. And one gas. Now, of course, the liquids and the gas will be symbolized by something that is solid. The constraints are time, materials, and that the individual parcels must fit together within a rectangular shape for their group but they also must remain portable, meaning you don’t want to design something that connects one parcel to the next. And the designs may also not exceed the border of your parcel. You’ll want to be sure to let students know whether or not the criteria and constraints will apply to each individual parcel or the entire group design. Remind students that Planetopia is a fictional planet, so while some of the aspects may be Earth-like they can also be never before seen.
INCREASE DIFFICULTY
If you want to increase the difficulty one thing you could do is require that along the borders of the parcels within any group that they have to have something that unifies or blends them together. You can constrain how much white or flat space can be left on the parcel. So maybe 25% or less of each parcel may be flat land. If you want to review any 2D or 3D shapes you could either require or constrain those within the designs. And you can also have students build to scale or vary up your elevation requirements so that perhaps the students need to find the landform with the tallest elevation. And then make sure that they have within their designs other objects or landforms that are 75% of that elevation, 33% of that elevation, etc. If students are learning about specific types of landforms like peninsulas or islands you can require that students have examples of that within their designs as well.
MEASURE RESULTS
To measure results you can have students say yes or no that they met their requirements for the three landforms, two bodies of liquid, and one gas. Or you can have them actually give some more specific examples or details about those. You might also ask students to identify other ways to judge success within this challenge. For example, they might say a good design is one that makes a student want to visit that parcel or live on that parcel.
EXTEND
As always there are a lot of great extensions for this activity. Quite a few of them have to do with maps so one of the first things I like students to do is to create a 2D map that just basically shows the landforms as well as the bodies of liquid. Have them go over that with a Sharpie marker and then make a master photocopy of that so that you can do multiple map activities without having them re-draw that map every time. From the black line master, you can have students do things like a detailed map showing the different landforms and bodies of water with a key. They can create contour maps. If they are doing anything with plate tectonics they could draw in the different plates as well as the arrows and the types of boundaries and how they figured that out.
Just about any Earth Science standard can be introduced or reviewed based on this challenge. Layers of Earth, Pangaea, plate tectonics, the rock cycle, identifying physical properties, natural resources, states of matter, changes in state, and then always have students bring it back to compare and contrast Planetopia with Earth. You may wonder if it’s worth your instructional minutes to create these details for a fictional planet but it really increases your student engagement when you’re teaching about plate tectonics, volcanoes, earthquakes, weathering, and erosion when they have something physical in the classroom that they can compare and contrast.
If you want to tie in some ELA you could have students create travel guides with compelling arguments for places people should want to visit on their parcel and places they should avoid. Or have students write short diary entries using very deep sensory details about what it was like to take off for Planetopia, the travel through space, how long did it take? What was it like when they landed? What did they hear, see, smell, feel? You can also tie in lessons on the solar system or specific types of landforms. And I have even more ideas in the resource. So you are ready to do this challenge in your class on your own, but if you want to save so much time check out the resource.
RESOURCE DETAILS
This resource contains everything you need to guide your students through the Planetopia Parcels Challenge, including modifications for use with second through eighth graders. You’ll still need to gather the materials of course but the rest has been done for you. You’ll get an Aligned NGSS Science Standards, links to my STEM Challenge how-to videos to help you get the most from each challenge, and the Planetopia Parcels materials list. In teacher tips you’ll find premise and setup, how to increase or decrease difficulty through the criteria and constraints list, measuring results, and cross-curricular extension suggestions. You’ll find an editable criteria and constraints list so you can tailor the challenge to your students. And a script with audio file option to introduce the challenge to your students. For student hand-outs there are two versions, four-page expanded room for response for younger students and a two page condensed space paper-saver version. You’ll also find a set of group discussion questions. In the extension hand-outs, you’ll find templates for describing Planetopia surface features, identifying layers of Earth and its atmosphere, rock type notes, rock cycle, and Pangaea activity. You’ll also get writing, math extension, and process flow templates. This resource is available individually and is part of a discounted mega STEM challenge bundle. Coming in late Spring 2018 it will also be part of a new discounted Planetopia bundle. Digital paperless versions for us with Google Slides are also coming soon. Links can be found in the description below the video.
There’s some extra information and video content on the blog post, I have linked that below. Make sure you’re following and subscribed. I hope your week has been packed with feel-good teaching moments. See ya next time.