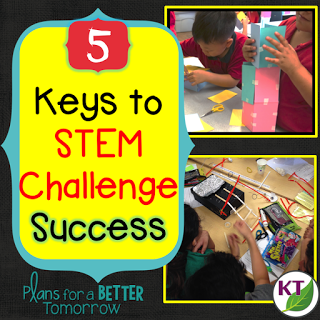

I’ve been giving some thought to what the most important keys are to any successful STEM challenge. I’ve summarized my thoughts below, and the video you see here explores each key in greater detail. However, if you prefer to read, you’ll find the video transcribed at the end of this post.
Key 1: Criteria & Constraints
Students need to have guidelines when they are designing solutions to problems. A criteria & constraints list is your opportunity to tailor virtually any challenge to any age group. The three areas you’ll keep in mind when defining your criteria & constraints are:
– Age appropriate, but still challenging
- Keep high expectations! Make sure you aren’t inhibiting your students based on your own limiting beliefs.
– Content lessons you could relate to the challenge
- STEM challenges can provide students with prior knowledge and context for new information
– Storage Space
- If you’ll need to store the designs for any length of time, limit the dimensions of the final product
 |
| Examples of differentiated Criteria & Constraints lists for the same challenge |
Key 2: Materials & Group Size
I know, I’m a cheater! This is technically two keys, but they’re short so I felt justified!
Materials
Each challenge requires a different set of materials, but in general, you want materials to be:
– Simple (i.e. budget friendly)
- Many materials you will likely already have at home or in your classroom. Others should be things you can buy at a dollar store, hardware store, Target, etc. There’s no need to break the bank!
- Note: I’m going to create a blog and video on materials for July 21, 2016.
– Malleable
- The more flexible the materials, the more creative your students’ designs will be. Foil and pipe cleaners are you best friend!
– Constrained
- Constrain the materials to keep your budget down, the size of their designs reasonable, and to challenge the students!
Group Size
Groups should be 2 – 4 students. Any more than that means someone is almost always on the outside looking in. We want all the students engaged in the process of designing and building solutions to problems.
Key 3: Time

There’s no way around it, time management during STEM challenges is tough! With experience, you can expect to get through most challenges in one hour or less. When you’re still new to it, it’s more realistic to plan for 75 – 90 min. If you’re a multiple subject teacher, plan & build one class period and record, reflect, and discuss the next.
Two things that will help:
- – While students are building, call out elapsed time every 10 minutes or so.
- – Tell the students ahead of time it is very possible they won’t be done building when you call time, and that’s ok. If they aren’t done, they can simply explain what they need to do to finish and/or their intent. Caveat: this only works when you employ Key 4!
Key 4: Multiple Iterations
If you’ve only been doing one-offs, you’re only exploring the tip of the STEM Challenge iceberg; there’s a world of delight & opportunity under the surface!
Reasons to do multiple iterations:
– Helps ease student anxiety over a timed build.
- Some students will freeze up if they think they only get one chance.
– Increases creativity & innovation
- The overachievers will usually take a safe route, trying to get the “right” answer if they only get one pass.
– Makes students less upset over hearing time called for the first build
– Gives you the chance to use STEM challenges as engagement & culminating activities, serving as a pre/post assessment
– Not doing it is akin to allowing your students to never revise their writing as long as they tell you how they could make it better
– The Next-Gen Science Standards say you should
Key 5: You

Your mindset and what you do and don’t do is very important during STEM challenges!
Your Mindset
Let go of any attachment you have to success and/or aversion to failure, or redefine what success and failure mean to you! You want to be flexible and teach your students that failure is nothing more than data you can analyze to lead to your next success. One of the reasons I love using STEM challenges is that I want to make sure my students are not afflicted by a fear a failure that keeps them from living fully!
Your Role: Facilitator
You won’t lead, solve, or fix anything for the students. This is about developing their ability to problem solve, for the most part, independent of adult intervention. You’ll mostly observe and ask questions, but you will not suggest what they should do. This is easier said than done! That’s why my next two videos and blog posts will be a two part series about your role as the facilitator and will cover how you should prepare, what to do during the build phase, and what to do when the challenge is over.
As always, reach out in the comments or by email if there’s a specific question or topic you’d like me to address. 🙂
Check out these other great ideas from some of my favorite bloggers!

Credits:
photo credit: Triple Timer via photopin (license) photo credit: Point via photopin (license)
Font in pin image
https://www.teacherspayteachers.com/Store/Khrys-Bosland
Video Transcription
I’m Kerry. Today we are going to be talking about the five keys to STEM
challenge success. Let’s get started.
first key to STEM challenge success is setting up an appropriate criteria and constraints
list. This is basically how you can tailor virtually any STEM challenge to
virtually any age group. Let’s just take a look at a couple of examples.
you see here is a very simple criteria and constraints list for a challenge
called Mini Mayflower. When the list is this simple I often just write it on
the board. If it’s a bit more complicated, I’ll print the list out for the
groups. From a student’s perspective the criteria and constraints list serves
as a framework for what they’re required to do and what they’re limited from
doing.
rules list for your classroom, you want to keep it short and sweet. I recommend
no more than five criteria and five constraints. As a side note, I use pennies
to measure capacity for this challenge but you can use any uniformed object,
base ten blocks, bottle caps, beans, marshmallows, whatever.
example on the right shows how you might modify the challenge for an older set
of students. Now we have two basic criteria: capacity and speed. Adding the
speed criterion gives me an opportunity to teach about waves, wind, energy
transfer, forces using the challenge to develop student’s prior knowledge and
serve as a context for those lessons.
you’re creating your criteria and constraints list you want to consider three
main areas. First, you want to do whatever you need to make it age appropriate
but still challenging for your kids. Second, you want to think about any
content standards you’re hoping to connect and incorporate from all your
subject areas.
this is a handy dandy place to address any storage or space concerns in your
classroom. If you’re planning to store their designs for any period of time you
might want to say, “No dimension may exceed six inches” or their
design must fit within a shoebox so you can stack them up and put them to the
side if you’d like to do that. You can also accomplish that just by limiting
their materials provided. I tend to do both honestly. Here you’ll see a few other
ideas to modify criteria and constraints.
second key to STEM challenge success is materials and group size. Okay, I’m
cheating because that’s a two-in-one but they’re short so I think we can get by
with that. For materials, you want to keep them simple, keep them malleable,
and don’t give the students too much.
materials, you want to be able to use a lot of the things you already own,
already have in your classroom or in your house. Then you want to supplement
that with things that are pretty simple and cheap from like a Dollar Tree, a
Target, Home Depot, even the grocery store in a lot of cases.
want to keep things malleable so things like pipe cleaners and foil, things
that students can manipulate and bend to their whim. One of the reasons you
want to do that is if you give them things that are too leading it sort of
stamps on the creativity because they know what to do.
example, if you were doing some kind of a shelter and you give them something
like this, well, most students are going to stick that down and build a little
roof and you’re going to have a bunch of houses that all look the same. You
want to give them things that they have to mold into their own shapes and using
their own creativity.
other part of this key was the group size. You want to keep your groups small.
I would say two to four. Once you get past four students you’ll notice that
there’s always going to be one or two who can never quite get into the group
and get their hands on the building and be able to fully participate. That’s
why I always like to keep it from two to four. Occasionally I do individual
STEM challenges as well. Since one of the keys and one of my goals is to work
on collaboration I do like to have them working together quite a bit.
third key to STEM challenge success is your time management. Now admittedly,
this is one of the toughest to manage and to handle and to get your arms
around. I’ve got a few tips that will make it a little bit easier for you. STEM
challenges basically all have three parts. There’s planning, you need to have
time for building, and you need to have time for a reflection and discussion.
you have a lot of experience with STEM challenges you can knock most of them
out in about an hour. With about 5 to 10 minutes for planning, 30ish for
building, and then you give them another 15 to 20 for reflection and
discussion. That’s pretty ambitious if you’re just starting out. My suggestion
would be to plan for closer to 90 minutes.
silver lining here is that this is a first class problem. The reason it’s going
to take you more time is first the students are going to beg you for more
building time because they’re not quite done, they’re not quite finished and
they’re excited about what they’re doing.
the second reason you’ll need more time is even if you don’t give them the more
building time once you get into the part where you’re going around from group
to group and discussing their designs with them and asking questions it’s such
a beneficial activity and it’s amazing to hear the students talk about their
work that you will probably be a big part of the reason that the time goes over
because you don’t want to cut that short.
are in a self-contained classroom, I’d say plan for 90 minutes. If you are a
single subject teacher my suggestion would be to plan for two class periods.
The first day you would let the students plan and actually design and build.
Then the second day you would come back and do the reflection and discussion
part.
option so that you don’t have to use an entire class period the second day, you
can send them home with reflection questions that they can answer on their own
and then come back to class and your discussion period would be a bit shorter
because they don’t need to also complete their individual reflections since
they’ve done that for homework.
have a couple of tips for time management. The first is that while the students
are building you can be walking around and while you’re making observations and
you might be asking them questions about their designs, you’re also keeping an
eye on the clock and letting them know how much time has elapsed and how much
time they have left. I usually call that out in minutes. Sometimes I mix it up
and I call out in fractions. “One-third of your time has elapsed.”
can also have students assigned to do that within the actual building groups if
you prefer. I tend to like to stay away from that because I don’t really want
anyone fixated on the clock in the group. I want them all fixated on their
designs. That’s up to you.
another thing that you can do is before the actual design starts, the actual
challenge starts, I usually let them know, “There’s a really good chance
you are not going to be finished when I call time. That’s okay. You don’t need
to be finished when I call time. Just get as close as you can.”
when you actually go around and you’re sharing out with the class, each group
is sharing out their designs, if they aren’t done then they just say,
“This is what we’re going to do next” or, “This was our intent
of where we were going and this is how it’s going to be when it’s
finished.” Now that really only works well and only satisfies that student
and your class if they know that they’re going to have multiple iterations,
which brings me to the next key.
fourth key to STEM challenge success is using multiple iterations for your
challenges. If you’ve just been doing one-offs, then what you’re looking at is
the tip of the iceberg. The tip of the STEM challenge iceberg and that’s not
nothing. It’s nice. Fun to look at but you’re missing this whole world of
opportunity down here if you aren’t doing a second and sometimes even third
iteration.
that that does take up a little bit of time and it’s probably even causing some
anxiety for you so let me tell you some of the reasons you really want to try
this out. The first thing is there are many students who experience a lot of
anxiety when presented with a time-based challenge or activity. They freeze up
and they don’t know what to do so they just don’t do anything.
another set of students who want to be perfect and if they know that they only
get one chance they are going to take the safe route and they are not going to
be as creative as they might, they won’t take as many risks as they might with
their design. If they know that they’re going to have another opportunity to
fix it or change it or try a different idea later, if their first one doesn’t
work out.
are already two great reasons. Another thing is if you have two iterations,
let’s say, you can use the STEM challenge as an engagement activity for content
lessons that you want to teach that are related back to that activity. You can
also use it again as a culminating activity. It’s like a pre and post
assessment and in-between all the things you teach or they research they can go
back and apply when they do the second iteration of the challenge. That’s a big
deal.
might be thinking, “That all sounds well and good but we don’t have time
to be doing two iterations of every STEM challenge so instead maybe we could
just discuss what they would do if they designed it again.” I would ask
you to pause and think about that. Would you do it with writing? Would you allow
students to write a story, show it to you, and instead of revising it just say,
“Well, you know, I could just add some adjectives and maybe I’ll add some
more dialog and I’ll make it more interesting that way” but then they
never actually do the writing?
that’s madness. You wouldn’t accept it. I beseech you to apply that same
mentality to STEM challenges. If you don’t believe me and if you say,
“Okay, I agree with you but it just doesn’t make sense in my
schedule” then I’m just going to ask you, I’m going to beg you, one time.
Plan one time to do a STEM challenge twice just to see what happens. I’m not a
betting woman but I would bet that you will make time for it again in the
future because what you’re going to see is all what lies beneath the water with
the iceberg and you’re going to want to do it again.
I know I’m beating a dead horse here but I just want to give a personal example
of this. Then I’m going to move onto the next key. I promise. I had an
opportunity last year to volunteer in a second grade classroom. We did the
index card build a tower. The students had the first iteration before lunch and
then they went to lunch and after lunch we came back and did a second.
was so much fun about that is in the first round there’s varying degrees of
success but nobody exceeded a standard ruler so nobody needed more than a 12-inch
ruler to measure the height of their index card tower. Some of the students
were very frustrated and had a hard time, I think I had a couple of tears, and
that’s not that unusual when students are first starting out. Remember we’re
trying to build resilience so it’s okay to let them cry.
in the second round several of the groups actually graduated from using a ruler
to needing a measuring tape from Ikea and just to see their faces light up and
to be so excited about how much they had accomplished in just a short period of
time because even the groups that didn’t need the measuring tape everybody
improved upon their first tower and that was really delightful to see.
don’t have to do a second or third iteration on every single STEM challenge you
do but make sure that you try it at least so you can see the difference. I know
you’ll want to try it more.
fifth key to STEM challenge success it’s you. Your mindset, what you do, and
what you don’t do during a challenge is really important. Let’s start with
mindset. Some of you, like me, might struggle with the idea of failure and
might believe that failure is bad. You have to let it go or better yet maybe
just redefine your definition of success and failure.
me, it’s a big goal of doing STEM challenges with students is to help them not
be quite so hung up on the idea of failure being bad as I was and am and I
continue to try to work through it and these challenges are really great for
that because they are going to fail. Some of the time it’s going to fail, it’s
not going to turn out the way that they want it to, and that’s kind of at least
half the point.
have to get in your mind as well that they don’t all need to build the perfect
answer, the perfect design, to every single problem. It’s okay that some of the
time it’s going to be an outright failure. What’s important is to use that and
make it a productive failure. If they’re looking at it afterwards and analyzing
it and coming up with a new idea for the next time then it’s not really
failure, is it? Again, you just need to get your mind set in that framework.
also need to remember that you are the facilitator in these challenges. You
don’t lead, you don’t solve, you don’t fix. That is a lot easier said than
done. Mostly what you are going to be doing in addition to preparing the
challenges and deciding the criteria and constraints list and whatever
extension activities, during a challenge you’re going to be walking around and
you’ll be asking them to tell you about their designs.
going to be more like a psychologist or a psychiatrist, whichever one asks you
the questions, but never gives you the answers, that’s the one you’d want to
be. When they say, “Oh, I can’t figure this out. Can you help me?”
You can ask them questions like, “Oh, tell me what you’ve tried.”
“What haven’t you tried?” “What could you try next?”
help me when I walk around the classroom to remember that is I never let myself
touch their designs when I’m having them tell me about them. I will cross my
hands while they’re talking to me or I put them behind my back and hold onto my
elbows. It helps remind me that it’s about them. It’s not about me.
much more meaningful for them when they actually do figure it out on their own
and they will get there. You just have to give them the time and the space to
do that. Just remember to take a step back and you’re not leading, not solving,
not fixing.
the other things that I do is I focus more when I’m going around if they’re
having trouble collaborating with their peers I do give them some tips and some
advice about that and help them solve those issues. In terms of the actual
building and design that’s up to them.
going to be going into this a lot more next. On the next two videos I’m going
to be talking really more in-depth about your role, the things you should be
saying and should not be saying, the things you should do and not do in
preparing for a challenge. Then also during and after the challenge. Be sure
you subscribe. I’m probably point the wrong way so I’ll just point to both
ways. Be sure you subscribe and I will see you next week.