The third challenge in the Back-to-School/Fall STEM Challenge series is Apple Annihilator (see Challenge 1, Challenge 2). If you’ve found your way here outside of the back-to-school season, not to worry! These challenges work great for fall apple activities and studies of forces and motion all year long!
Premise
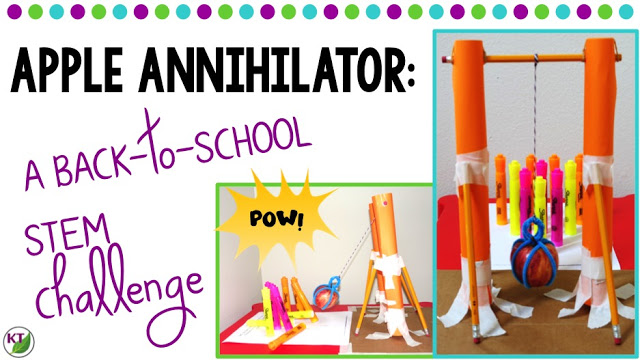
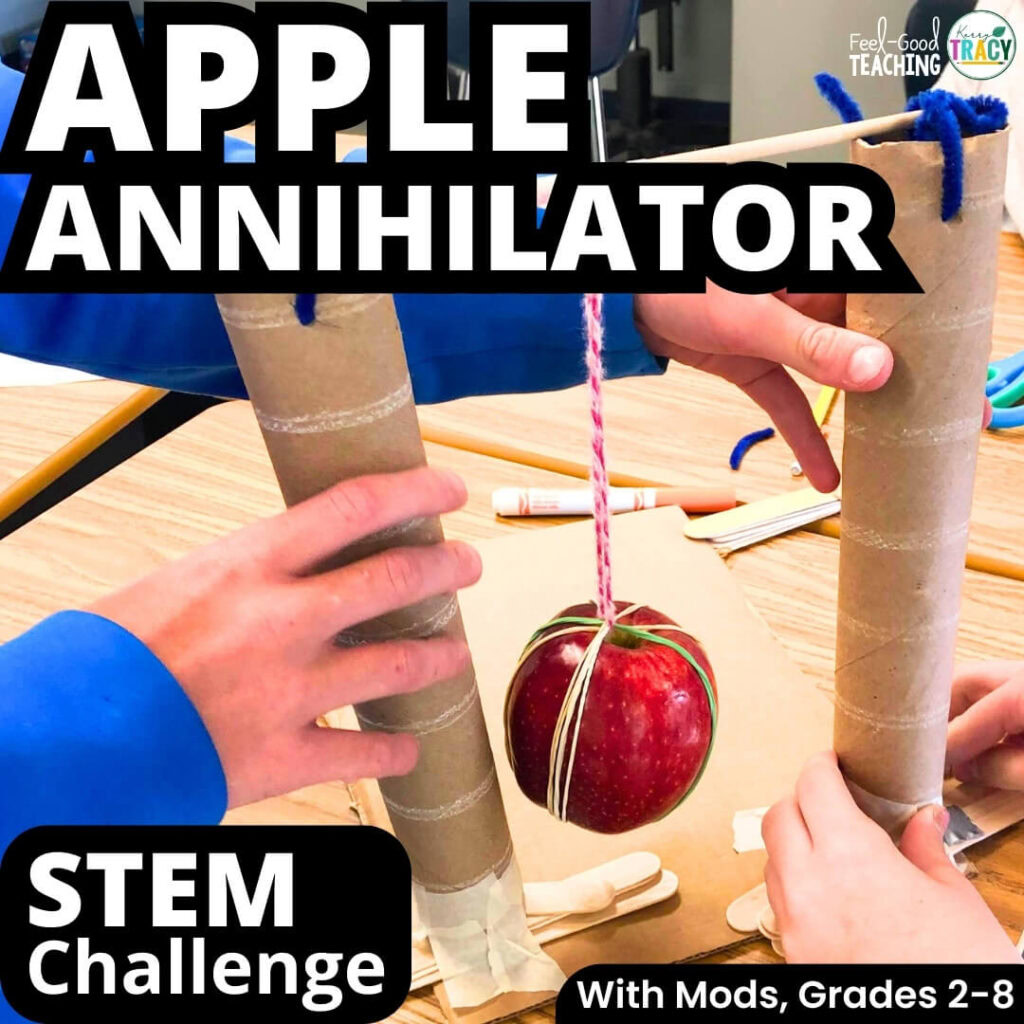
Working against a Criteria & Constraints List individually or with partners, students will design an apple wrecking ball built for annihilation and/or accuracy.
Materials
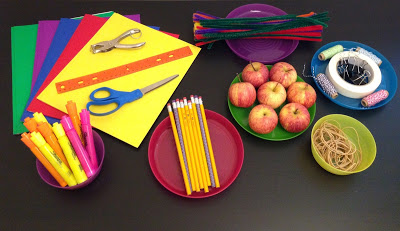
Sample/suggested materials for each student or group:
Materials you’ll need to do the activity are easily modified. Amazon Affiliate links are included below.
- Set of 10 Markers or highlighters
- Markers will be used like bowling pins, so must stand on their own Crayola or broad highlighters work well
- Apple (1)
- Pocket folder with prongs (1)
- File folder or pocket folder without prongs may be substituted
- Small or medium binder clips (1 – 2)
- Unsharpened pencils (4 – 6)
- Tape (24 – 36 in.)
- String or yarn (36 – 48 in.)
- Ruler
- Scissors
- Design analysis handouts (included in resource)
- Marker “bowling pin” handouts (included in resource)
Optional
• Cardboard boxes, tubes, or scraps
- helpful in building a support structure and base for the wrecking ball rather than attaching to desk/table)
• Dowels
Where Can I Find Out More?
If you’re familiar with my work, you know I’ve been switching over to using video to explain the bulk of my challenges. It seems to be the best/fastest way to explain the important details: materials, set-up, tips, modifications, extensions, demonstrations, and more! Who has time to read all that?! However, if you do prefer to read it, you’ll find the video transcribed at the end of this post. 🙂
Resources
Apple Annihilator is one of the five challenges in the Back-to-School/Fall STEM Challenge Bundle.
Other Back-To-School/Fall STEM Challenges:
Wondering if printable or paperless is the way to go? Check out this post.
Video Transcription
Can you see how excited I am right now? Challenge three of five is Apple Annihilator. The basic premise of this one is, the students are going to be building a wrecking ball using an apple and school supplies. Let’s a take a closer look at the materials.
This is the STEM Challenge Cycle you should follow for every challenge. I’ll define each step in another video. I’ve added a pop-in card to that video here, as well as a link in the description. This challenge is gonna take about 90 minutes again, and you can break that up over a couple of days if you like. One of the things you want to think about ahead of time is where you’re gonna have the students build. Will you have them build their wrecking ball directly onto their desk or table?
Will you have them connect it to the floor? What I like to do is, if you have cardboard scraps or boxes just lying around, I prefer to use that as a base just because then it’s portable, which makes things a lot easier. One other thing you need to think about is whether or not you want to be testing for total annihilation, meaning knocking down as many markers as you can, or if you’re gonna be going for accuracy.
1:09
For the criteria and constraints, students are building an apple wrecking ball to knock down as many marker pins as possible in one release. The distance from the hanging apple to the bottom edge of the pins handout should be at least two inches. For the constraints, of course we have materials and time, and the apple may not be pierced or punctured, and the students may not touch any part of the design except the apple during testing. If you have younger students, you might want to eliminate that last constraint and allow them to use one hand on the design itself to keep it steady as they are doing each release of the apple wrecking ball.
If you have older or more experienced students, you might be trying to increase the difficulty, in which case you can require the design be portable, don’t allow the design to be taped down to the desk or floor, increase the required distance between the wrecking ball and the pins, and have the students test for both annihilation and accuracy.
2:02
When you are having the students do this, you want to make sure that you tell them that they can choose the angle that they let go of the apple, as long as it’s level with the tallest point of their design or lower. It can’t be up above. Another thing is, you want to measure from when the apple is hanging loose, from the apple to the first marker needs to be at least two inches. So let’s give it a little test.
So for the accuracy test, you want to see if you can hit just one of the markers and none of the others. If you have younger students, you might want to just use one, but they have to tell you which one they want to hit before they go. If you have older students, I like to make them try to do all three, but you have to reset after each one, of course. This time, I’m gonna aim for pink only. Oh, I didn’t do enough of an angle. Oh, that’s a fail on that one because I got the pink, but I also got one I did not intend.
3:10
So you might recall that in the Apples Aloft challenge, I said you might want to pair Apple Annihilator and Apples Aloft because you’ve got a tower and you’ve got a wrecking ball, and those things go together really well. This is an opportunity for students to try to knock down their towers using their wrecking balls. So whichever one you do first, you either need to store it and wait for the other challenge, or you want to do these challenges back-to-back.
Newton’s Laws of Motion factor into this beautifully again. So if you have third grade, fifth grade, or middle school, you want to check out your physical science standards. If you are a self-contained teacher, you need to look for your cross-curricular connections. The more you can get out of a challenge, the better.
3:54
To extend, introduce or review Newton’s Laws of Motion, Newton’s cradle, and the conservation of energy. You can have students create a synonyms list for “annihilate,” so they might have words like destroy, topple, and of course annihilate on the list, and then have them assign value between one cent and one dollar to every word on their list, to indicate shades of meaning. You can then have students use these words to create a description paragraph. This is an opportunity to introduce students to “thesaurus-itis,” as I like to call it.
So using those higher point value words can actually be a distraction if you use too many of them. Encourage students to break it up and spread out their point values in their descriptive paragraphs. You can also have students create math problems based on their designs. This is a great opportunity to do fractions as part of a set, and of course conversions into decimals and percentages. If you have younger students, you can of course use simple addition and subtraction problems. If you use different color markers as I did, you might have problems such as, “How many more pink markers were knocked down than orange markers?”
You have all the basics you need in order to conduct this challenge in your classroom. If you’d like to know more or you want to save yourself time and energy and hassle of planning and prep, check out the resource.
5:07
This resource contains everything you need, including modifications for use with second through eighth graders. You’ll still need to gather the simple materials, of course, but the rest has been done for you. You’ll get Aligned Next Gen Science Standards for Engineering and Physical science, links to my STEM Challenge How-To videos to help you get the most from each challenge, and the Apple Annihilator Materials List.
In Teacher Tips, you’ll find premise and set-up, how to increase or decrease difficulty through the Criteria and Constraints List, measuring results and cross-curricular extension suggestions, including links to videos, articles, and suggested activities to help you and your students understand more about Newton’s laws of motion. You’ll find an editable Criteria and Constraints List so you can tailor the challenge to your students. You’ll find bowling pin templates to help guide students how to set up their markers for the accuracy and annihilation tests.
5:49
For student handouts, there are two versions; four-page, expanded room for response for younger students, and a two-page, condensed space paper-saver version. You’ll also find a set of group discussion questions. In the Extension Handouts, you’ll find task card templates for student-made questions related to the challenge. Use them for a game of scoot, a center for early finishers, or an option for sub-plans. You’ll also receive math extension and process flow templates.
This resource is available individually, and is part of the discounted Back-to-School and Mega STEM Challenge bundles. For one-to-one paperless classrooms, a version for use with Google Slides is coming soon. Links can be found in the description below the video.
I know your kids are gonna love this challenge. I think that I could not count or tell you how many times I have done this in the last couple of days. Oops! And it just does not get old. Make sure that you like and subscribe. Next week, I’m going to be going over challenge four, which is called Apple Ally. See you next week.


