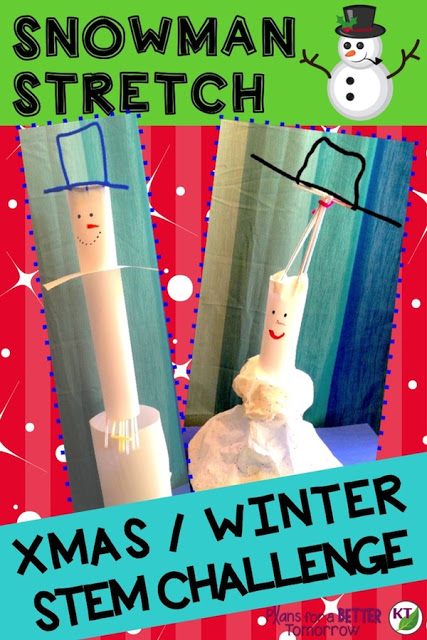
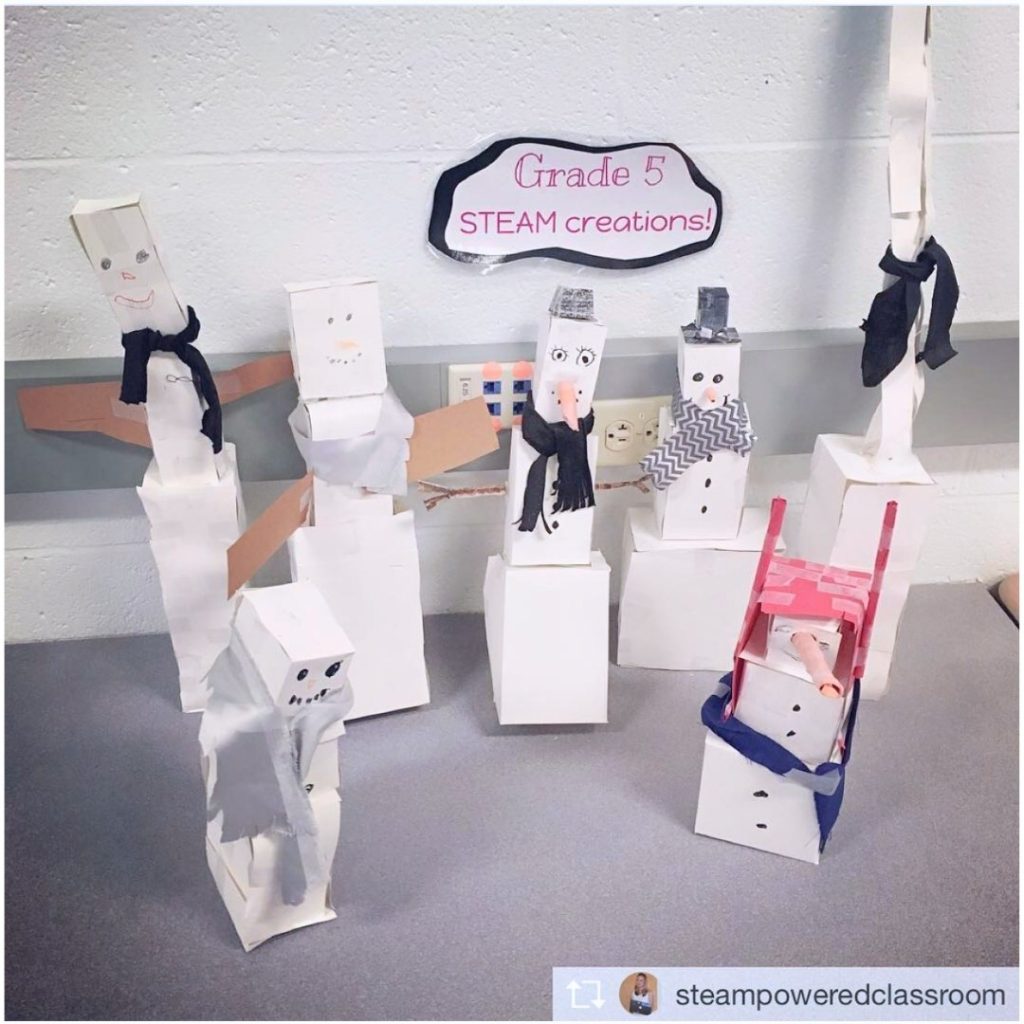
You are almost to Christmas/Winter Break, or maybe you’re visiting after break and looking for a way to ease those late winter blues! This snowman STEM activity is perfect if you’re looking for very low-prep and very simple materials. In fact, all you really need is a few sheets of copy paper, tape, and scissors for this one. You can always add more, but you likely already have what you need already!
Premise of Snowman STEM Activity
In this superb snowman STEM activity, Snowman Stretch, students are invited to channel their inner architects and engineers as they design and build the tallest free-standing snowman possible or one with the greatest volume. You can use this snowman STEM activity all winter long, changing out the base materials and tweaking the Criteria & Constraints list to keep it fresh!
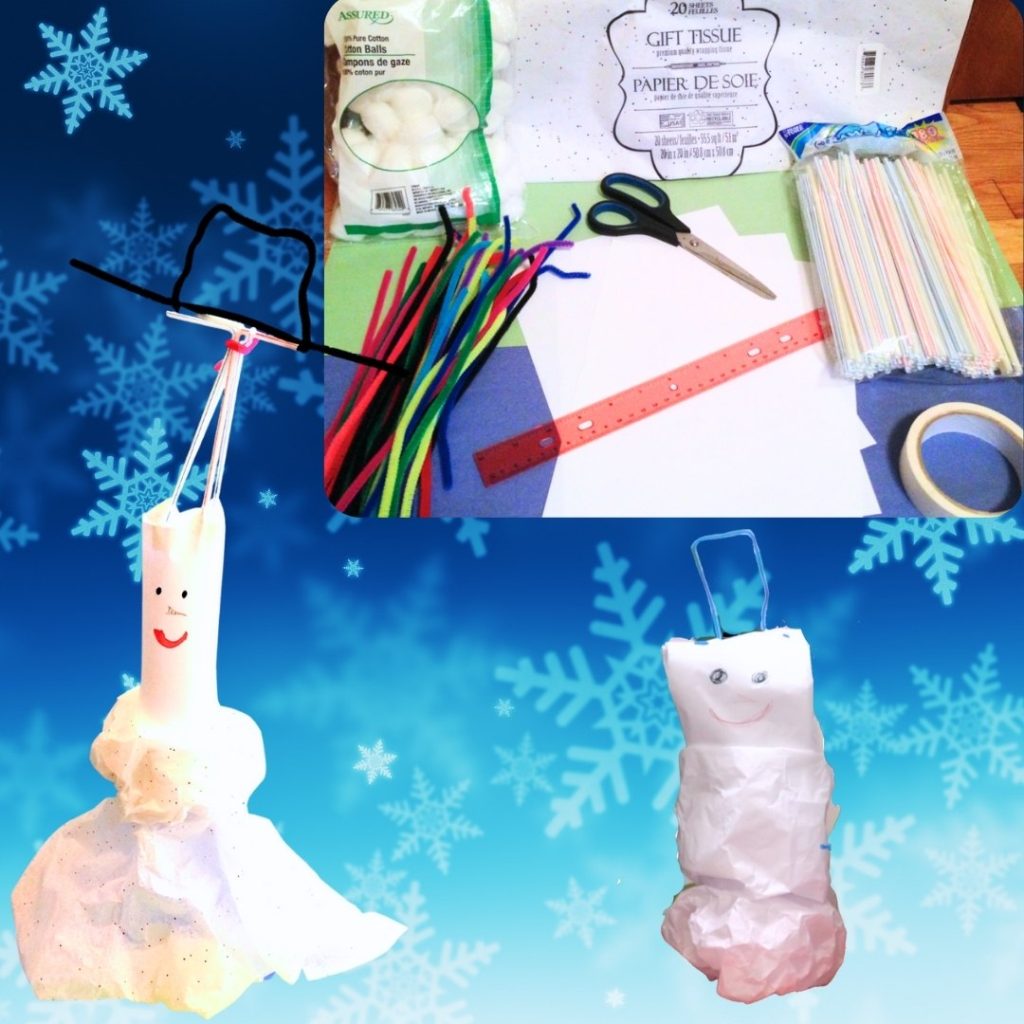
Materials Needed
- Copy paper (3-5 sheets)
- Tape (24 in.)
- Scissors
- Ruler or measuring tape
Optional Materials
- Bag of cotton balls and/or 3 pieces of tissue paper
- Straws (5 – 10)
- Pipe cleaners (5 – 10)
This captivating snowman STEM activity not only captures the festive spirit surrounding winter holidays but also encourages students to put their problem-solving skills to the test in a fun and collaborative way. With Snowman Stretch, teachers can inspire their students to think creatively, work together, and learn valuable STEM principles, all while embracing this festive time of year.
Picture Book Tie-ins for Snowman STEM
This challenge pairs well with Frosty the Snowman, or any of the books below (affiliate links below*):
*As an Amazon Associate I earn from qualifying purchases.
Where Can I Find Out More?
As you may already be aware, I’ve found creating video walk-throughs of my STEM challenges is the best way to explain the important details: materials, set-up, tips, modifications, extensions, and more! Check out the video below to learn more about this snowman STEM activity, Snowman Stretch. However, if you prefer to read, you’ll find the video transcribed at the end of this post.
Snowman Stretch STEM Challenge Pandemic Makeover
Are There Other Winter/Christmas/Snowman STEM Challenges Like This?
Of course! I can’t help myself! You’ll find all five of the Christmas/Winter STEM challenges I’ve created in the 5-challenge bundle briefly described in this post. Each challenge post is linked there for the walk-through videos and more details. You can also find this Winter and Christmas STEM activity alone (top left) or in a bundle of 5 Christmas and Winter STEM activities (top right). You may also like the Late Winter STEM Activities Bundle & the Valentine’s Day STEM Activities Bundle. Please reach out with any questions and tag me in photos of your students’ work on Facebook & Instagram if you want to give me a smile this holiday season!
You can also find this snowman STEM activity, Snowman Stretch, on Etsy!
Related Posts
Video Transcription of Winter/Christmas/Snowman STEM Activity: Snowman Stretch
Welcome to week four of the Winter and Christmas STEM challenges. This week we are talking about the snowman STEM activity, Snowman Stretch, where students build the tallest snowman possible. This is a really straight forward challenge, very simple criteria and constraints unless you choose to adjust them and you can do it with very little materials.
Just really a few sheets of copy paper and some tape is all you need. Everything else is kind of gravy on this one. You’ll notice with the copy paper snowman, I had to put the tier with his head down here so you could see him. Later, I will put a photo in so you can see the entire thing. He’s out of frame when I put his up there.
Let’s take a minute to look at the materials and the STEM Challenge Cycle. Remember the STEM Challenge Cycle? I just had a new video made on that, so make sure that you click and check it out if you didn’t last week. This is the STEM Challenge Cycle you should follow for every challenge. I’ve defined each step in another video. I’ve added a pop-in card to that video here, as well as a link in the description.
1:04
You saw the materials picture that there was tissue paper, copy paper, and cotton balls. You don’t need to use all of those. In fact, you could do the challenge a few different times and a few different ways using different materials as the primary source. Criteria’s pretty simple on this one.
I have the students have no more than three levels to their snowman and they can have an optional hat. The hat does not count as a tier and when they are measuring the height of the snowman, I let them measure to the top of the hat. The major constraint on this one to start is that the snowman must be freestanding. Can’t lean against anything and the kids can’t balance him up.
If you’re looking to make it a little bit trickier, there are a lot of different things that you can modify on this. One thing you can do is have the students, rather than measure the tallest snowman, have them measure for the greatest volume. Another thing you can do is just choose a percentage at 75%, let’s say, and tell the students that each successive tier must be 75% or less of the previous tier.
You can also require that the students make each new tier a different geometric solid and you can have them mix and match the primary material used within each tier. If I used tissue paper on the bottom tier, I can’t use it on the next one. I would have to use either the copy paper or the cotton balls or if there’s something else you provide, use that.
2:27
Measurement’s pretty easy on this one, obviously. We’re measuring for height. We’re going to measure from the bottom to the top of the hat. If you’ve chosen to have students build their snowmen for maximum volume, then they’re probably going to need to use some estimates because they’re probably not building in perfect geometric solids.
My bottom tier here is spherical, sort of. I will have to take some estimates. My second tier is cylindrical and my top tier, although you probably can’t quite tell, it’s closest to a triangular prism. The students will have to calculate the volume of each tier and then add everything together and they should have a buddy team assigned to them so they can check each other’s calculations.
The first extension activity that comes to mind here is anything to do with states of matter, but particularly changes in state. Obviously, Frosty the Snowman’s big problem was that he was melting. You can have students design an experiment in which they’re trying to figure out ways to either speed up the melting process or slow down the melting process and I would use ice cubes in that case.
If you choose to do that, of course, in any experiment where you’re waiting for something to melt, there will be lulls where the students need to take observations but maybe only every five or 10 minutes. If you’re looking for something to do in those lulls, I would recommend the Reindeer Relay. It’s a good time to run that race or any of the other challenges. If you’re going to be doing a second iteration, you can have students working on their second iteration and also following up on the melting experiment during that time.
3:56
Just a quick note. You might already have my Keep It Cool, Make It Melt challenge that’s part of the summer bundle. This actually might be a really interesting thing to do. Just do your first iteration of that challenge in the winter and the second in the summer. Just a thought. I haven’t tried it yet. So that’s all the basics there for you, but, of course, I always have more for you. Check out the resource.
Do you want to build a snowman? This resource contains everything you need including modifications for use with second through eighth graders. You’ll still need to gather the simple materials, of course, but the hard parts are done. You’ll get Aligned Next Generation Science Standards, links to my STEM challenge How-to videos to help you get the most from each challenge and a Snowman Stretch Materials list.
In Teacher Tips, you’ll find premise and setup, how to increase or decrease difficulty through the Criteria and Constraints list, measuring results, and cross-curricular extension suggestions. You’ll find an editable Criteria and Constraints list so you can tailor the challenge to your students.
For Student Handouts, there are two versions. Four-page expanded room for response for younger students and a two-page condensed space paper saver version. You’ll also find a set of group discussion questions. In the extension templates, you’ll find a set of handouts for students to design their own experiment to speed up the melting of ice with sample answer key. You’ll also find math extension and process low templates.
5:07
This resource is available individually and as part of a discounted Winter/Christmas and Mega STEM challenge bundles. Links can be found in the description below the video. Be sure you don’t forget to like and subscribe. I will be back next time with Frozen Fortress which is our fifth and final Christmas winter STEM challenge. See you next time.
Pin Me!
