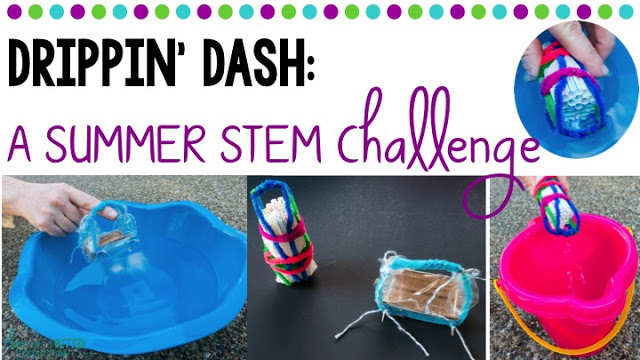
Are you getting the sense that your students are totally over this school year? Or maybe as the teacher you’re feeling a little checked out. What you need is a few engaging end of the year activities to get through it. Oh look, here’s one now!

Premise
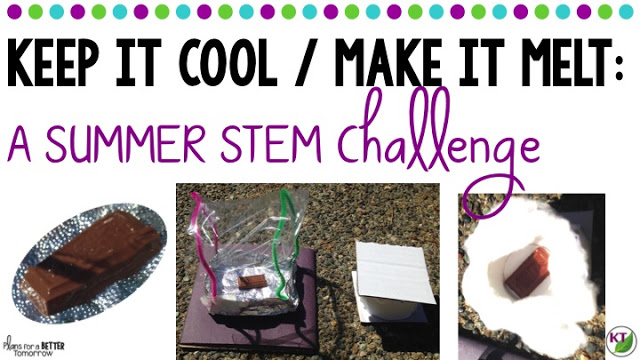
Working against a Criteria & Constraints List, and armed with one set of materials, students must create two devices: one to make chocolate melt faster and one to keep it cool longer.
 |
| Hershey’s is the best chocolate for this challenge. Find out why in the video below! |
Where Can I Find Out More?
If you’re familiar with my work, you know I’ve been switching over to using video to explain the bulk of my challenges. It seems to be the best/fastest way to explain the important details: materials, set-up, tips, modifications, extensions, demonstrations, and more! Who has time to read all that?! However, if you prefer to read, you’ll find the video transcribed at the end of this post.
Check out the video below to see Keep it Cool / Make it Melt in action:

Are There Other End of the Year Summer STEM Challenges Like This?
Of course! I can’t help myself! I have created 5 challenges for summer/the end of the school year! You can find the overview of each on this blog post. Each challenge is described in the post linked above, so be sure to check it out!
Please reach out with any questions and tag me in photos of your students’ work on Facebook & Instagram.

PIN ME
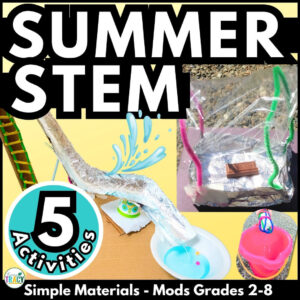
! Includes modifications for grades 2-8.")
Video Transcription
Hi, welcome to week three of the Summer STEM challenges. This one is actually more
like two challenges in one. It’s called Keep it Cool/Make it Melt. And as you
probably already surmised, the students will be creating two devices. One to
make the chocolate melt faster, and one to make it cool and prevent it from
melting. Before I get ahead of myself, let’s take a second to check out the
materials in the STEM Challenge Cycle.
0:22
This is the STEM Challenge Cycle you should follow for every challenge. I’ve defined
each step in another video. I’ve added a pop-in card to that video here as well
as a link in the description.
each step in another video. I’ve added a pop-in card to that video here as well
as a link in the description.
A couple of notes about materials. If you have a class set of reliable
thermometers, go ahead and bring them out for this challenge. Likewise, if you
have some digital cameras on hand or the students have cell phones, I like to
let them take pictures of their observation intervals. I do recommend using
Hershey bars for this challenge because there are so many changes for the
students to observe. The chocolate gets sort of shiny and the letters get
wobbly and lose their shape, eventually they can’t read the word at all. And a
bonus is that you can munch on some of the materials while the students are
working. Don’t worry, they won’t notice.
1:05
You’ll want to give students three pieces of chocolate. One, for make it melt, one for
keep it cool, and one as a control. Of course if it is at all possible, you’re
gonna want to choose a very sunny and bright day to conduct the challenge.
keep it cool, and one as a control. Of course if it is at all possible, you’re
gonna want to choose a very sunny and bright day to conduct the challenge.
The criteria and constraints are pretty simple. The students must design two
devices from the same set of materials. One to make the chocolate melt faster
and one to keep it cool for longer. Their designs have to contain the chocolate
so that when it does melt, it doesn’t get over the pavement or wherever their
designs are sitting. You let students know that the designs have to be placed
in direct sunlight and it has to be easy and quick for them to make
observations. You can see the make it melt design has a clear view into the
chocolate but the keep it cool design is covered but it has a lid that easily
lifts off.
1:47
If you wanna add some difficulty, you can require that any material used in one
design, must also be used in the next. You can require that the keep it cool
design is open air on at least one side or you can require that the students
make this a unified design where keep it cool is in one compartment and make it
melt is in another, but they are connected.
design, must also be used in the next. You can require that the keep it cool
design is open air on at least one side or you can require that the students
make this a unified design where keep it cool is in one compartment and make it
melt is in another, but they are connected.
To measure results, students are going to make observations of make it melt, keep
it cool, and the control at intervals of five to 10 minutes. Obviously for make
it met, they’re looking for the shortest time possible to get the chocolate to
complete liquid state. And for keep it cool, we’re trying to prolong that
amount of time. For the control, you can decide if you wanna have students
place a piece of chocolate in just the small cup or a paper plate. Do be aware
that sometimes the control will actually melt faster than the make it melt
designs. When I’ve seen this in the past, it’s usually because the control is
on a paper plate that’s in direct contact with very hot pavement. Whereas their
designs sometimes are not in direct contact so don’t benefit from that direct
heat transfer. Students sometimes put it on a piece of cardboard, extra piece
of paper that can make a difference.
2:49
Now, of course you don’t want the students just sitting around watching the clock,
waiting for another five minutes to pass, so you’re gonna need to have
something else planned during the observation period. I recommend having derp
and dash relay race or working on one of the other summer STEM challenges. And
of course another option is always to get a head start on those extension
activities.
To extend anything to do with states of matter is gonna be great for this
challenge. You can have students research, watch videos, maybe even create
their own videos about the properties of each state of matter and what causes
changes in state. You can have students do some research on insulators or
conductors or even how color affects heat absorption. You can have students
create their own experiments. If you don’t have time to do a full second
iteration of this challenge, I do recommend once the students have done some
research on heat transfer to let them have a make it melt competition. They
have another opportunity to create a new make it melt design based on all the
things that they learned and it’s a class competition. First piece of chocolate
that melts wins.
3:47
If you’re looking to tie in some ELA, I like to use this as an opportunity to
practice personification. Have students write a short story or paragraph as
though they were the piece of chocolate melting. You can also tell the students
that frosty the snow man is just dying to take a vacation in San Diego,
California. Have them write a short story about how he prepares, the adventures
that he has, and any problems he encounters along the way.
You now have all the basics you need to conduct, Keep it Cool/Make it Melt in your
classroom, on your own. But as always, I have worked tirelessly and packed this
resource so full of goodies, take a second to check it out.
classroom, on your own. But as always, I have worked tirelessly and packed this
resource so full of goodies, take a second to check it out.
4:20
This time saving resource contains everything you need including modifications for
use with second through eighth graders. You’ll still need to gather the simple
materials of course but the rest is ready and waiting. You’ll get Aligned Next
Generation Science Standards, links to my STEM challenge How-to videos to help
you get the most from each challenge and the Keep it Cool/Make it Melt
Materials list. In Teacher Tips, you’ll find premise and set up, how to
increase or decrease difficulty through the Criteria and Constraints list,
measuring results in cross-curricular extensions suggestions. You’ll find an
editable Criteria and Constraints list so you can tailor the challenge to your
students as well as an editable observation log. There are two versions of
design analysis handouts, four-page expanded room for response for younger
students and a two-page condensed space paper saver version. You’ll get one set
for keep it cool and a second for make it melt. You’ll also find a set of group
discussion questions.
In the Extension Handouts you’ll find a states of matter research log as well as map extension
process flow templates. This resource is available individually and as part of
the discounted Summer and Mega STEM bundles. Links can be found in the
description below the video.
process flow templates. This resource is available individually and as part of
the discounted Summer and Mega STEM bundles. Links can be found in the
description below the video.
5:19
Make sure you’re following my store in Teachers Pay Teachers and subscribe on
YouTube. I’m going to be back next time with wicked fast water slide. Have an
excellent week. I will see you next time.
YouTube. I’m going to be back next time with wicked fast water slide. Have an
excellent week. I will see you next time.