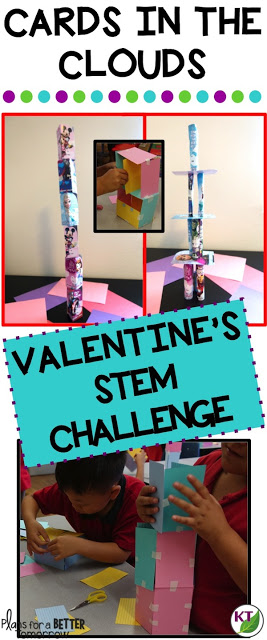
Let’s face it, most kids immediately trash their Valentine’s Day cards once they strip them of candy and stickers. Why not put those cards to good use before they get recycled? In comes a Valentine’s Day cards STEM activity!
Maybe you work with older students who don’t do a card exchange. In this case, you can encourage a week of kindnesses and compliments that will become the building blocks of the Valentine’s Day cards STEM activity. Students will transcribe their not-entirely-random acts of kindness and compliments on index cards and use those to build their towers of love!
Premise of Valentine’s Day Cards STEM Activity
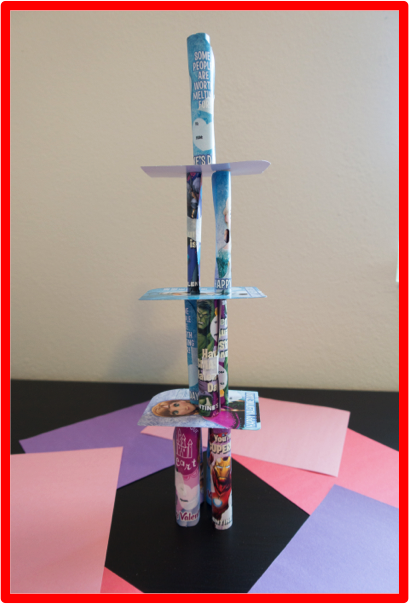
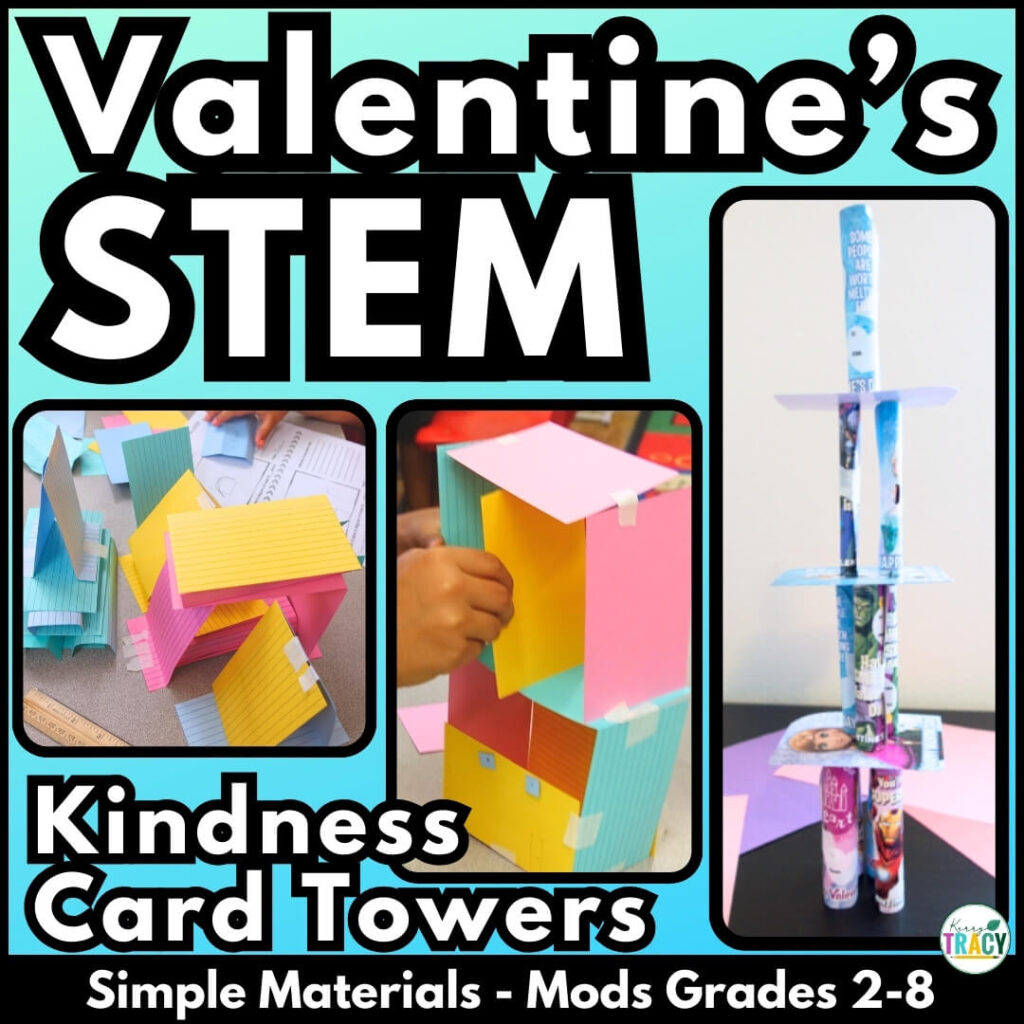
In Cards in the Clouds, students create the tallest towers possible from their Valentine’s Day cards or from kindness/compliment cards they create themselves! This Valentine’s Day cards STEM activity will keep your students engaged in brain-busting work disguised as fun!
Materials for Valentine’s Day Cards STEM Activity
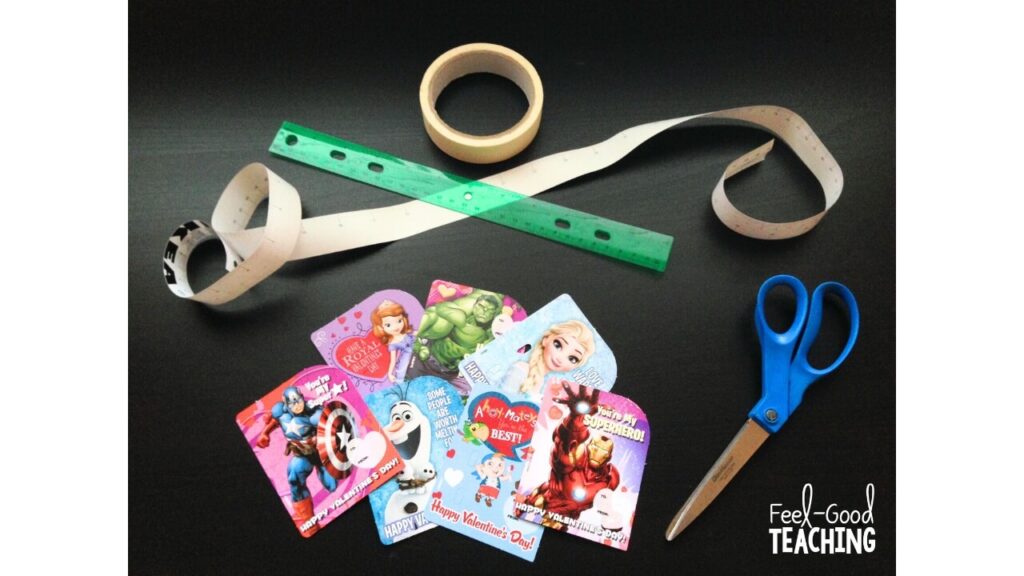
The list of materials you’ll need is short and easily modified, making this Valentine’s Day Cards STEM activity simple to incorporate with very little need for additional prep. You’ll need:
- 20+ Valentine’s Day cards
- 20+ index cards
- 4-5 Valentine’s Day card boxes
- Copies of “love letters” on paper or card stock
- Tape (12 in.)
- Scissors
- Ruler or measuring tape
- Copies of data recording & analyzing handouts
- Optional: craft stick, pipe cleaner
Where Can I Find Out More?
As you may already be aware, I’ve found creating video walk-throughs of my STEM challenges is the best way to explain the important details: materials, set-up, tips, modifications, extensions, and more! Check out the video below to learn more about this Valentine’s Day cards STEM activity, Cards in the Clouds. However, if you prefer to read, you’ll find the video transcribed at the end of this post.
Regular Video Walk-Through
Are There Other Valentine’s Day STEM Challenges Like This?
Yes! You’ll find all five of the Valentine’s Day STEM challenge activities I’ve created in the 5-challenge bundle briefly described in this post. Each challenge post is linked there for the walk-through videos and more details.
You can also find this Valentine’s Day cards STEM activity, Cards in the Clouds, alone or in a bundle of 5 Valentine’s Day STEM activities .
Please reach out with any questions and tag me in photos of your students’ work on Facebook & Instagram!
Related Posts
Video Transcription
Hi there, welcome to our final Valentine’s Day STEM challenge. This Valentine’s Day Cards STEM activity is called Cards in the Clouds, a.k.a. Tower of Love. And as you probably guessed, students use their Valentine’s Day cards in order to make the tallest tower possible. If you have older students I have an alternative available but before I get into it, let’s check out the materials and the STEM Challenge Cycle.
This is the STEM Challenge Cycle you should follow for every challenge. I’ve defined each step in another video. I’ve added a pop-in card to that video here as well as a link in the description.
0:34
This challenge is great to do actually on Valentine’s Day or the day after. And you can have students pull from the Valentine’s Day cards they receive. Maybe choose five to ten and then come together in their group in order to build. If you’re worried our students won’t want to part with their cards, you can ask them the day before Valentine’s or even a week ahead to save the boxes that their cards come inside and then have everybody bring that in their groups and they can use that as their material.
The other option is to do this challenge the day after Valentine’s Day so that students can take home their cards. Take off the candy, the stickers, whatever, and then bring in the cards the next day. If you have older students they’re probably not exchanging Valentine’s Day cards anymore so I have a couple different ways around that.
1:15
When I first made the resource for this, thinking about that problem I created a template that has just clip art, envelopes that look like little love notes. This year I was preparing for this video and doing an update to the resource and I came up with another idea I like better. I’m still going to leave the love notes inside the resource in case you like that or prefer that.
I’m thinking to do is have students create compliment or kindness cards. They can just do this on notebook paper. I would not give them the cards ahead of time. Now on the day of the challenge the students are going to transfer their compliments or their kindnesses or a mixture onto index cards that they will then use to build their towers.
1:58
In my mind, these colors represent four different students in a group. Then I’d have the white cards represent kindnesses that they did throughout the week and you can decide if you want to limit those. Maybe two random acts of kindness for each student or maybe you want to encourage a lot of kindness throughout the week, so maybe you don’t put a limit on it.
There are a couple ways to increase the difficulty to make it more challenging. One is to limit the tape. First I would always constrain the tape 12 to 24 inches. I’ve done this with second graders and only gave them 12 inches of tape before. It was difficult but they managed. For example, on this tower there is no tape used. Obviously you can see in the corners.
2:36
You can let students know if they’re allowed to tape their base to the surface. I generally just allow it even for second graders. You could require students to build their towers on an uneven surface, so you could just put maybe a textbook down on top of the desk and require that their tower straddle the desk and the textbook.
You can introduce some criteria for different geometric solids. In this tower here I’ve got rectangular prisms in pink and teal, I have triangular prisms in yellow and cylinders in blue. You can require two or more or specific geometric solids particularly if you want to do some extension activities based on maybe volume.
You can introduce environmental conditions. Maybe it has to withstand an earthquake or wind. Although I will say if you’re not allowing them to tape that base down, it might be a little bit too much. Earthquake test.
3:30
And then another idea would be to have student’s build multiple towers so kind of a city of love. If you do that you want to have definitely a criterion for how many the minimal would be so maybe three towers in their city and take the results as an average height of all the towers.
To extend on this one, you could research what makes structures very stable so you could talk about the ancient Romans and arches. You could talk about the actual geometric solids that worked best within the designs in general. You could have students do some research on how modern buildings are made to be earthquake safe or safer.
4:07
If you’re studying the human body and you’re into the part where you’re talking about cells, tissues, organs and organ systems, I would ask students to come up with an analogy where they compare their cards and towers to any of those groups. Now if you do this I wouldn’t be satisfied with just that level, I would wish their thinking and ask them to explain why they think they’re analogous.
These ones very straightforward. You have what you need in order to conduct this challenge, but take a second to check out the resource because it’s going to save you a lot of time and there’s some extra goodies in there.
4:36
Love is in the air. This resources contains everything you need including modifications for use with second through eight graders. You’ll still need to gather the simple materials of course, but the hard parts are done. You’ll get Aligned Next Generation Science Standards, links to my STEM challenge How-to videos to help you get the most from each challenge and the Cards in the Clouds Materials list.
In Teacher Tips you’ll find premise and setup, how to increase or decrease difficulty through the Criteria and Constraints list, measuring results and cross curricular extension suggestions. You’ll find an editable Criteria and Constraints list so you can tailor the challenge to your students.
5:07
For student handouts there are two versions. Four-page expanded room for response for younger students and a two-page condensed space paper saver version. You’ll also find a set of group discussion questions. For older students who don’t exchange Valentine’s Day cards, alternative building materials are provided.
In the Extension Handouts you’ll find a set of math questions you can connect to this challenge as well as student math extension and process flow templates. This resource is available individually and as part of the discounted Valentine’s and Mega STEM challenge bundles. Links can be found in the description below the video.
Don’t forget to like and subscribe, I’m going to be back next week with the first of the St. Patrick’s Day challenges. Have a very happy Valentine’s Day and an excellent week, I will see you next time.
Pin Me!
