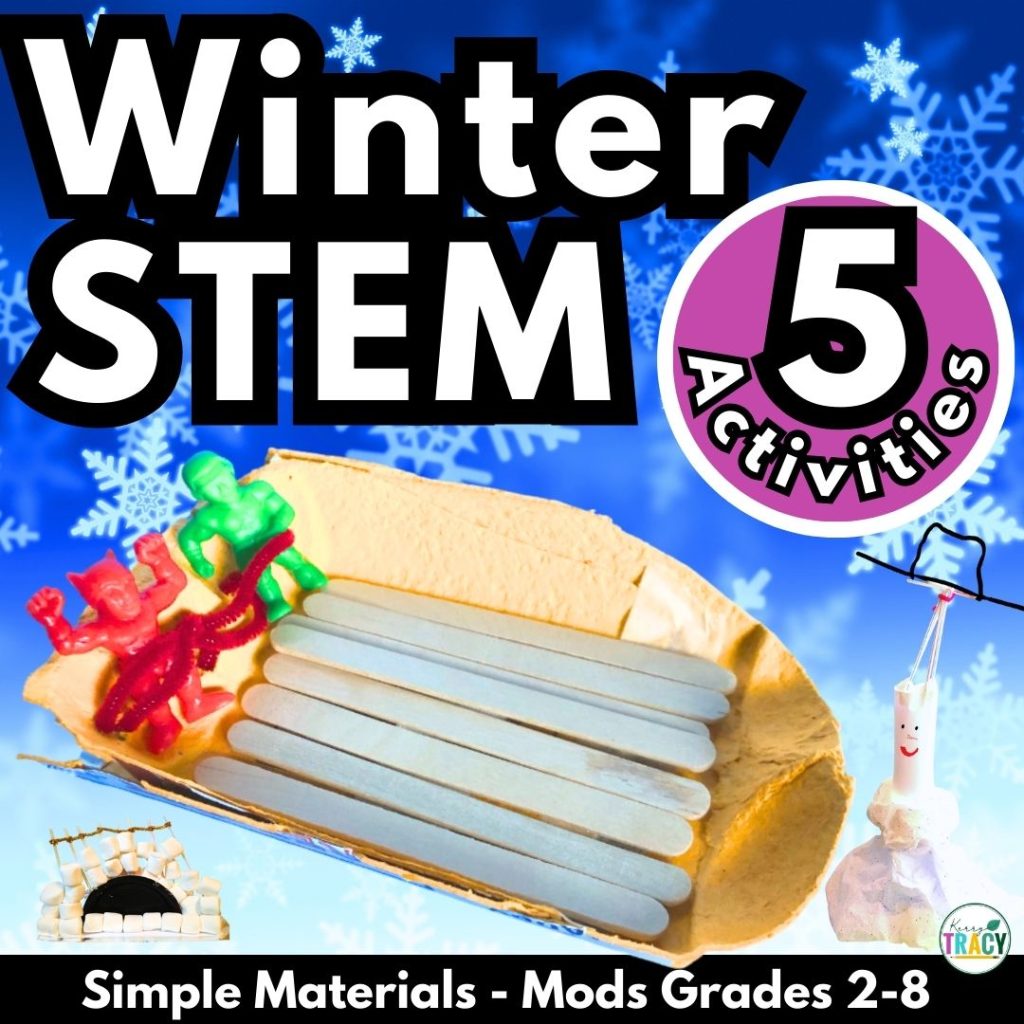
Mid-January already? Time just flies by, doesn’t it? I am happy to share another winter STEM challenge with you this week: Frosted Forest. This one is heavily weighted toward math, so I think of it as more of a STEM Challenge!
If it’s not winter where you live, feel free to call this Triangle Tree. There’s no need to wait for winter to try this challenge out!
Premise
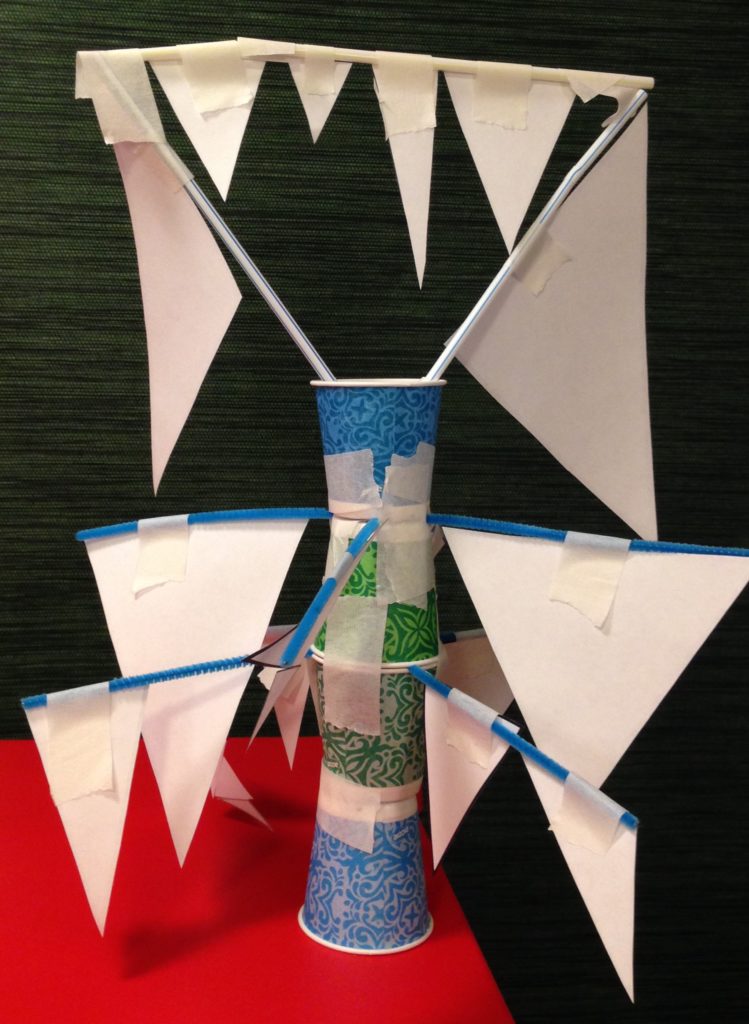
In Frosted Forest, students aim to build the “iciest” tree possible in their class’s Frosted Forest! This challenge is all about triangles and has a VERY wide range of difficulty options. You can keep it very simple by just measuring sides and assigning points to icicles based on the longest side, or you can add layers of complexity to tailor this triangle STEM activity to your students. I cover all the details in the video walk through, so read on!
Materials for Frosted Forest Triangle STEM Activity
The list of materials you’ll need is short and easily modified, making this winter or triangle STEM activity simple to incorporate with very little need for additional prep. You’ll need:
- White construction or copy paper (3-8 pages)
7 triangle templates are included, or students can create their own triangular icicles in a computer program or by hand. - Pipe cleaners (5 – 8)
- Craft sticks (5 – 8)
- Straws (5 – 8)
- Small paper cups (4 – 6), cardboard tubes, and/or cardboard scraps
- Scissors (ideal for each student to have his/her own)
- Masking or clear tape (1 roll/group; don’t limit the tape)
- Rulers (ideal for each student to have his/her own)
- Design analysis & data recording handouts
Optional Materials
- Protractors (if measuring angles; ideal for each student to have his/her own)
- Folders, Ziploc bags, or large envelopes to contain triangle cutouts if working on multiple days.
- Calculators (for younger students and/or those with special needs to calculate point values)

Where Can I Find Out More?
As you may already be aware, I’ve found creating video walk-throughs of my STEM challenges is the best way to explain the important details: materials, set-up, tips, modifications, extensions, and more! Check out the video below to learn more about this triangle STEM activity, Frosted Forest. However, if you prefer to read, you’ll find the video transcribed at the end of this post.
Are There Other Winter STEM Challenges Like This?
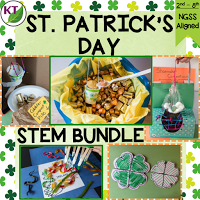
Of course! I can’t help myself! You’ll find all five of the Late Winter STEM challenges I’ve created in the 5-challenge bundle briefly described in this post. Each challenge post is linked there for the walk-through videos and more details. You can also find this Winter STEM activity alone (top left) or in a bundle of 5 Late Winter STEM activities (top right). You may also like the Valentine’s Day STEM Activities Bundle & the St. Patrick’s Day STEM Challenge Activities Bundle. Please reach out with any questions and tag me in photos of your students’ work on Facebook & Instagram if you want to give me a smile this winter season!

You can also find this Winter STEM activity, Frosted Forest, on Etsy!
Related Posts
Video Transcription
Hi there. It is the best day of the week: STEM Challenge day, and I have a brand new one for you. It is called Frosted Forest. It’s yet another winter challenge. If you are not in the market for a winter challenge, feel free to call it Triangle Tree and use it any time of the year.
This STEM Challenge should have an extra special capital M, that’s maybe twice the size of the other letters in STEM Challenge because it is heavily weighted toward math. The premise of this one is the students are trying to make the “iciest” tree possible in partners or groups. Before I get any further, let’s take a look at the materials in the STEM Challenge Cycle.
0:35
This is the STEM Challenge Cycle you should follow for every challenge. I have defined each step in another video. I have added a pop-in card to that video here, as well as a link in the description. A quick note about the materials. You don’t necessarily need to provide everything that I showed you, but the more materials you provide, the more variety there will be in the students’ designs.
I would not constrain the tape on this one. I just give the students the full roll, and if you are concerned about aesthetics, then you will probably want to use scotch tape or clear tape instead of masking. You can see, I am not too particular about that.
You might want to think about doing this challenge over two lesson periods. In the first lesson period, you can have the students build the trees, and begin designing and measuring their icicles. Then, in the second lesson period, you can have them actually assemble the trees and complete their data recording and analysis. A quick note: if you do spread it over two days, it’s really helpful to give the student groups page protectors or envelopes, where they can store the icicles that they have already created, as well as their data measurement sheets.
1:36
There is a very wide range of difficulty possible with this challenge. Let me start with the simplest version and then start working up. You can take or leave whatever you like, based on the age and ability of your students.
The basic criterion constraints, no matter which version you do: start by saying that the icicles must attach to a branch. They may not extend beyond the branch, and they have to connect along a full side. They should not be dropping from a branch by their vertex. Icicles should not come in contact with the ground, or the trunk, or another branch. If you are keeping it simple, they should also not touch any other icicles. As we add difficulty, you will see we add an exception for that.
And you will want some version of criterion that the triangles need to be at least different sizes, and again, there is a way to add difficulty for that too. If you find that one of the icicles breaks one of the criteria or constraints, then its points don’t count. If, for example, and icicle is touching the ground, it doesn’t count.
2:35
Okay. So, the simple version of the challenge. The first thing you are going to do, is you are going to want to help the students with their icicle creation by providing them with triangle templates. This way they don’t have to create their own. They can just cut and choose from what’s available. Now you can set up a constraint, that the students are only allowed to use one icicle per branch. You can set a minimum or maximum of icicles that can be used, as well as branches if you like.
You might also want to think about limiting the time that students have to select their icicles from the template. So, maybe take 10 minutes, and in that 10 minutes, the students have to cut and have selected the ones they think they are going to use. Don’t get rid of the extras, though, because when you actually get into the build, I think it’s all right to give them an opportunity to go and pull from something that will work better than what they initially selected. It’s just meant to keep things moving along, so they don’t get mired in that step.
3:27
Before the students actually attach their icicles to the tree, they will be taking measurements. Now, if you have young students, you are probably going to have them measure each side of the triangle to the nearest, maybe centimeter, or half inch. In order to give the icicle a point value, you can either have them add up all three sides, so take the perimeter, or if they are very young, you might just have them select the length of the largest side.
So now, if you want to start increasing difficulty, what you can do first of all is think about the icicle creation. Have students create their own icicles in PowerPoint or another program. Or they could even hand draw them. If you allow your students to design their icicles in some program, then definitely set a constraint for how many pages they are allowed to print.
So, I would say three to five pages, and then when they do the build portion, I would give them maybe one extra blank page of paper, in case they want to hand draw any extras, because they will see when they begin to actually assemble and put the icicles on the branches, that some of the initial icicles that they thought they were going to use, turn out not to quite work so well.
4:31
For older students, I would not have a constraint for only one icicle per tree. I would allow multiples, as you see going across here, this is a branch. It is an odd one, but it is, and one rule is that the icicles may contact at the vertices, but they may not overlap on a branch. If you want to go a step further, allow icicles to be connected to other icicles.
So, I have an example right here, where I have one, two, three, four icicles are actually cascading one off the other, and I basically treat a secondary icicle by the same rule as the primary to the branch. So, what I mean by that, is the secondary icicle cannot extend past the edge of the icicle it is attached to, and it has to connect on a full side.
One criterion I would be sure to add for older students, if it’s age-appropriate, is to provide examples on their icicle tree of every type of triangle. I want to see a scalene, equilateral, isosceles, and I am also going to want to see an acute, obtuse and right triangle, and obviously some triangles will count for both.
If you want to take it a step further, you can add a per cent contribution criterion, so right triangles must comprise at least 30% of the tree, or some variation on that. If you want to get really intense, you can replace the triangles with cones, and turn this into a 3D challenge.
5:58
So now, we need to talk about how students are assigning point values to their icicles. As I said before, you are going to have your students taking various measurements. Whatever is appropriate.
And I even have an option in my resource, where I have a bonus point line. You also want to have students record all their measurements before they actually attach the icicles to the tree. It’s much easier to do it first.
Now, you will find that if you have the students label all their measurements and information on the actual icicles, you might not like the way that it looks. And if that bugs you, feel free to turn this into a steam challenge. You can have the students come up with color coding, for the different kinds of triangles. So, maybe just a small, little circle colored in, or maybe a pattern or something, that might make it look a lot nicer.
So, as soon as you are going to record all the information of all of their icicles, when they go to build, they might not use them all. They are tracking all the information in a data table, ahead of time. It’s helpful to actually number the triangles as well, so that if they decide one doesn’t really work in their design, it’s easy for them to take it off, and then cross it off of the data table, because obviously you can’t use the points, if it’s not on the tree.
7:38
For extensions on this, obviously anything to do with triangles. You can also ask students if they think they might have been able get more points, had the icicles not needed to be triangles, but some other polygon. And then you could repeat the challenge using that other polygon. You can also study plant adaptations in the winter. You could also do a little bit of research about stalactites and stalagmites, and then compare and contrast with icicles.
Now, you have what you need in order to conduct Frosted Forest on your own, but there are a lot of extra goodies in this resource, so make sure you check it out.
Save your most precious resource time. This resource contains everything you need, including modifications for use with second through eighth graders. You will still need to gather the simple materials, of course, but the hard parts are done.
You will get Aligned Next Generation Science Standards, links to my STEM Challenge How-to videos to help you get the most from each challenge, and the Frosted Forest Materials list. In Teacher Tips, you will find premise and set-up, how to increase or decrease difficulty through the Criteria and Constraints list, measuring results, and cross-curricular extension suggestions.
8:37
You will find two levels of editable Criteria and Constraints lists, so you can tailor the challenge to your students. For Student Handouts there are two versions: a four-page expanded room for response for younger students, and a two-page condensed space, paper saver version. You will also find a set of group discussion questions. You will also get four versions of editable data recording handouts: seven triangle templates, and one cone nets template.
In the Extension Handouts, you will find classifying practice with the answer key, as well as math extension and process flow templates. This resource is available individually, and as part of the discounted Mega STEM Challenge Bundle. Links can be found in the description below the video.
Just a quick reminder again: if you are taking photos of the challenges in your classroom, I would love to be tagged. My social media is linked below. Make sure you don’t forget to like and subscribe. Next week, I am back with the first of the Valentine’s Day Challenges. See you next time!
But imagine, if it had been the same tree. That would have been pretty cool!
Pin Me!